
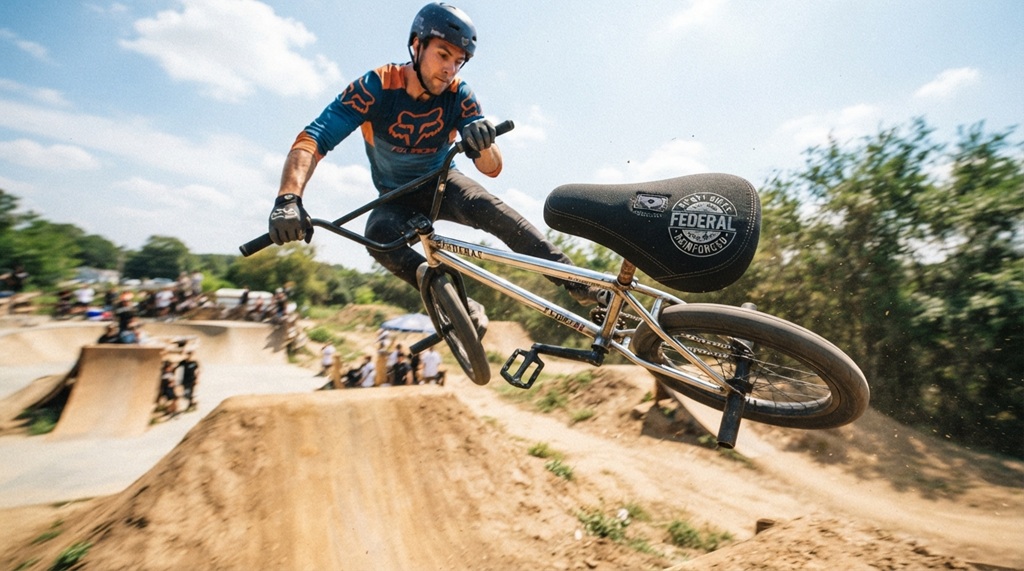
Whether you’re hammering laps at the local skatepark, grinding rails in the streets, or just cruising to meet friends, your BMX saddle takes a beating. A flimsy seat doesn’t just look out of place; it can tear, bend its rails, or become unbearably uncomfortable within weeks. The struggle is real when you’re trying to balance weight, strength, and comfort. This guide cuts through the noise to help you pick a durable BMX seat that matches your riding style, budget, and long-term needs without turning your bike into a boat anchor.
Key Takeaways
- Focus on rail material and construction: Chromoly or hollow steel rails handle stress far better than cheap steel, especially for landings and tricks.
- Match seat size to your discipline: Street and park riders often prefer smaller, lighter seats, while trail and cruiser riders may need more padding and surface area.
- Look for reinforced bases and impact-absorbing designs: A plastic base with internal bracing or a molded design resists cracks from heavy impacts.
- Consider the trade-off between weight and durability: Lighter seats often use thinner covers and less padding, which can sacrifice longevity.
- Check the seat post clamp compatibility: Ensure your seat post uses the right clamp size and the rail diameter matches your setup to prevent premature failure.
Why BMX Seats Fail and What to Avoid
The most common reason a BMX seat fails is not just the material of the top, but the rails and base. Cheap seats use low-grade steel rails that bend under hard landings, especially when you case a jump or slam down hard from a manual. The plastic base can also crack if it’s made from brittle recycled materials without proper cross-bracing. Another frequent failure point is the nose of the seat, which takes a lot of friction and pressure when you pinch the bike between your legs. Finally, the cover—often made from thin vinyl—wears through quickly when you slide across concrete or grind on the seat itself.
To avoid wasting money, steer clear of “department store” seats with glossy, thin vinyl and hollow, soft plastic bases. These prioritize looking flashy over surviving real impacts. Instead, inspect the underside of the seat. Look for structural ribs, thick mounting bosses around the rail connection, and a cover that feels tightly bonded to the base, not loose or wrinkly.
Critical Components of a Durable BMX Seat
When you understand what makes a seat robust, you can make a smarter purchase. It’s not just about the brand name; it’s about the materials and how they’re put together. Here’s the breakdown of the three pillars of durability: the cover, the padding, and the base/rails.
The Cover Material and Stitching
Most quality seats use either a durable full-grain leather or high-density vinyl. Leather is naturally tear-resistant and molds to your body, but it requires some break-in and can soak up water. High-density vinyl (often called “P.U. leather”) is lighter, waterproof, and easier to maintain, but the quality varies heavily. For a durable BMX seat, look for covers that are stitched with heavy-duty thread, not just glued. Double or triple stitching at stress points—around the nose and the rear corners—adds significant lifespan. Ripped stitching is a classic failure that happens before the material itself wears out.
Padding Density, Not Thickness
Thick, squishy padding feels nice in the shop but compresses and breaks down fast. What you need is high-density EVA foam or molded polyurethane. This type of padding holds its shape, absorbs vibration, and provides support without losing its integrity. Forget the idea that more foam equals more comfort. A durable BMX seat for riding uses dense foam that’s low-profile, keeping you close to the bike for better control while still taking the sting out of rough landings. If you can easily compress the foam with your thumb to the base, skip it.
Base Construction and Rail Design
The base is the chassis of the seat. It must be rigid yet slightly flexible to absorb impacts without cracking. High-quality seats use a nylon or polypropylene base with injected internal ribs. These ribs prevent the seat from “oil-canning” (flexing too much) under load. The rails are where most durability failures occur. Chromoly (Cr-Mo) steel rails are the industry standard for strength-to-weight ratio. Some top-tier seats use hollow titanium or chromoly rails to shave grams without losing stiffness. If you ride street or park, always opt for chromoly rails over “Hi-Ten” steel, which is cheaper and bends significantly easier.
Also, pay attention to rail size and style. There are two main types: the classic “U” shaped rail and the “S” shaped rail used on pivotal seats. The clamping area of the rail must match your seat post. Using the wrong size clamp—or forcing a metal clamp over a pitted rail—can cause rail crush and lead to snapping. To extend the life of your setup, consider a durable BMX seat that integrates well with modern pivotal posts, as these reduce stress on the rail by distributing clamp force more evenly.
Comparing Seat Styles and Their Lifespan
Not all durable BMX seats are created equal, and the “right” one depends heavily on how you ride. A seat that survives five years of street skating might last one season of racing. Here’s a quick breakdown of the three main geometries and how they hold up over time.
Pivotal Seats
Pivotal seats are the modern standard for street, park, and flatland. They use a sturdy single-bolt system that clamps the seat directly to the post. Because they have no traditional rails, they eliminate that specific failure point. The pivotal design is smaller and lighter, which is ideal for riders who want to minimize weight. Durability is high for impacts, but the mounting bolt can come loose over time—apply threadlocker and check it weekly. The small size means less padding, so they can feel stiff on long cruises.
Railed Seats (Traditional)
These are the classic two-rail seats found on older bikes and many race bikes. They offer a larger surface area, which many riders find more comfortable for seated pedaling. Durability depends entirely on the rail material. Chromoly rails on traditional seats are nearly indestructible, but the saddle base can still develop cracks near the nose. A pro of traditional seats is secure rail placement if the clamp fits perfectly. A con is the increased weight and the potential for rail misalignment that puts uneven stress on the post.
Mid-Size Seats
Seen often in the “mid-school” revival, these are hybrids. They have a slightly longer nose than a pivotal seat and a wider tail, but they still use a pivotal mounting system. This design tries to bridge the gap between comfort and agility. Durability is generally excellent because the base is sculpted to take stress in specific areas. They are a smart choice if you want a compact form factor without feeling like you’re sitting on a stool.
Weight vs. Strength: The Real Trade-Off
In BMX, every gram counts, but not at the expense of snapping a seat mid-ride. You need to assess your riding style honestly. If you’re a technical street rider who throws your bike around, a 10-ounce svelte seat with thin material might look cool, but it will likely crack after a few hard slams. If you’re a big guy (over 200 lbs) or ride ramps with heavy impact, you need a seat with more material.
There’s a common misconception that “light” equals “weak.” However, modern engineering allows for strong, impact-resistant micro-polypropylene bases that are remarkably light. The trade-off comes in the padding and cover thickness. A durable BMX seat that prioritizes strength will typically feature a slightly thicker base edge and a heavier-duty vinyl. You might save 4 ounces with a race-oriented seat, but you lose the durable impact protection that a street seat provides. Don’t fixate on the scale; look at the construction details.
Optimizing Seat Installation for Maximum Durability
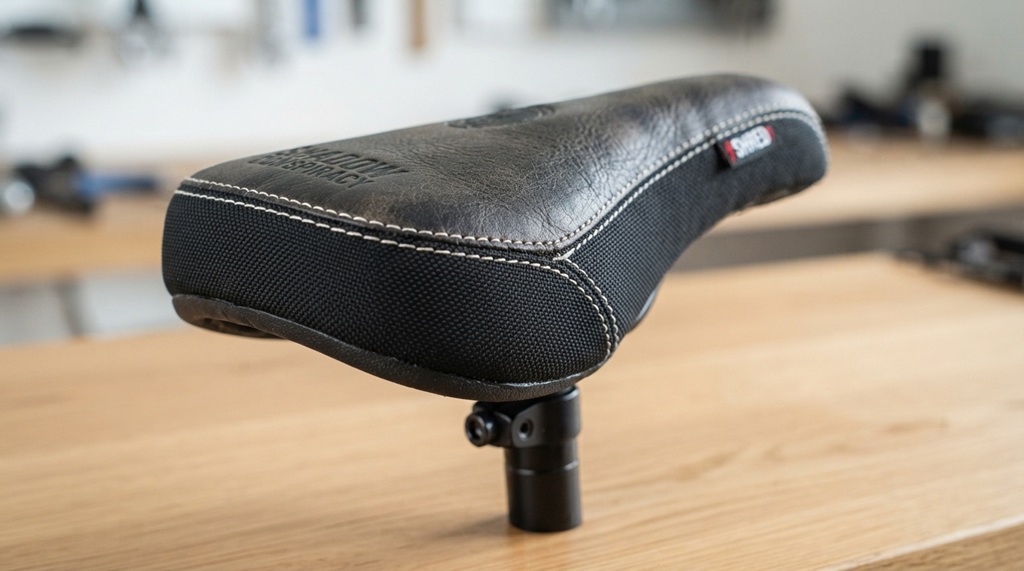
You can drastically extend the lifespan of even the toughest BMX seat by properly securing its mounting hardware, as most failures—from annoying slips to cracked rails and snapped posts—stem directly from improper installation. Taking the time to correctly align and torque your seat post clamp prevents micro-movements under impact, protecting both the seat base and your frame from premature fatigue. Furthermore, establishing the right angle and position gives you maximum control during heavy landings—an essential setup habit similar to keeping your drive system tensioned so you can prevent issues like why rear wheel couplers slip on Portland, OR hills.
Step 1: Verify the Clamp Size and Type
Measure the diameter of your seat post. Standard sizes for pivotal posts are typically 25.4mm (not the same as 22.2mm handlebars). Traditional rails usually need a 7/8″ (22.2mm) clamp. Using the wrong size creates a “hot spot” that concentrates stress and damages the rail.
Step 2: Use Thread Locker on Pivotal Bolts
Pivotal seats use a single M8 bolt. This thread experiences a lot of vibration. Apply a medium-strength thread locker (like Loctite Blue) to prevent it from backing out. Do not over-tighten—you can strip the threads in the post or seat base. Tighten until firm, then back off a quarter turn if you feel resistance.
Step 3: Grease the Clamp Interface
For traditional railed seats, apply a thin layer of grease to the bottom of the rails where they meet the clamp. This prevents rust and allows the clamp to slide slightly under flex, reducing tension that can cause rail snapping. Never clamp the seat in a way that pinches the rails at an angle.
Maintenance Routines That Prolong a Seat’s Life
A little care goes a long way. A durable BMX seat can last years if you maintain it. Ignoring grime and salt will cause the rails to corrode and the cover to dry out and crack. Here are three maintenance habits to adopt.
First, wipe the entire seat with a damp cloth after every session, especially in dusty or muddy conditions. Grit acts like sandpaper, grinding away the vinyl and stitching. Second, every few months, treat a leather seat with a mild leather conditioner. For vinyl seats, use a UV protectant spray to prevent sun damage and cracking. Third, periodically check the tightness of your seat clamp and pivotal bolt. Do not wait for it to become loose while you’re riding. A loose part gets battered and fails prematurely.
Budget vs. Premium Seats: Where to Spend
The price range for BMX seats varies significantly, but durability doesn’t always increase linearly with price. Here’s a realistic look at what you get at different price points.
| Price Range | Common Materials | Durability Expectation | Best Use Case |
|---|---|---|---|
| $15 – $30 | Hi-Ten steel rails, thin vinyl, standard plastic base | Low to Moderate; may bend rails or crack base on heavy impacts | Casual riding, light cruising, beginners |
| $35 – $60 | Chromoly rails, higher-density vinyl, reinforced base | High; strong and reliable for all but extreme abuse | Most street, park, and trail riders |
| $80+ | Titanium rails, fiberglass-infused bases, premium leather | Very High; minimum weight with maximum strength | Competition, hardcore street, weight-weenies |
A mid-priced seat with chromoly rails is the sweet spot for 90% of riders. You avoid the fragile nature of cheap seats without paying for marginal gram savings. The premium seats offer quality, but the biggest gains are in weight reduction and minimal comfort differences. Don’t feel pressured to buy the most expensive option unless you specifically need titanium for competition.
Common Questions About BMX Seat Durability
Do I need a specialized tool to install a pivotal seat?
No. Most pivotal seats require only a single 8mm Allen wrench (hex key) to install or remove. Traditional railed seats require a screwdriver or a socket for the clamp bolts. Always use a properly sized tool to avoid stripping the bolt head.
How do I know if my seat is too heavy for my riding style?
Pay attention to how your bike feels when you hop or throw it sideways. If the rear end feels sluggish or hard to pull up, a lighter seat can help. However, do not sacrifice durability for weight if you’re a heavy-impact rider. A slightly heavier seat that lasts is better than a light one that snaps.
Can I make a worn-out seat more durable?
You can extend the life of a good seat with minor repairs, but you cannot make a weak seat strong. Reglue peeling vinyl with “shoe goo” or similar polyurethane glue. However, if the base is cracked or the rails are bent, replacement is the only safe option. Riding on a broken seat risks injury.
Are leather seats more durable than synthetic ones?
In terms of abrasion resistance, yes, but only if maintained. Good leather resists tearing and stretches slightly to absorb impacts. However, it degrades if left wet or dirty. Synthetic “leather” (microfiber/PU) is much easier to care for and often outlasts cheap leather. For all-weather durability, modern synthetic materials are generally a safer bet.
What is the most common reason seats fail?
Bending or snapping of the rails at the point where they exit the base is the most common failure for traditional seats. For pivotal seats, it’s usually the cracking of the plastic base around the central mounting hole. Both are caused by impact stress and improper clamping tension.
Conclusion
Choosing a durable BMX seat isn’t about finding a magic indestructible product; it’s about matching materials to your riding habits and taking care of them. Prioritize chromoly or titanium rails, a reinforced base, and high-density padding. By understanding the role of pivotal versus traditional mounts and how your weight affects the setup, you can confidently select a seat that lasts. Give your seat the same maintenance attention you give your drivetrain, and it will reward you with miles of comfortable, reliable riding. Don’t rush the decision—check the clamp size, inspect the build quality, and invest in a model that won’t let you down mid-session.
Frequently Asked Questions
What is the best material for a BMX seat rail?
Chromoly (Cr-Mo) steel is the best overall material for strength, weight, and cost. It resists bending and breaking reliably. Titanium is lighter but significantly more expensive and offers diminishing returns for casual riders. Avoid Hi-Ten steel, which bends too easily.
How tight should I tighten the pivotal seat bolt?
You should tighten the pivotal seat bolt until it is snug, then give it a quarter turn further to seat the base. Use a torque wrench if you have one—about 15-20 Nm is usually sufficient. Over-tightening can strip the threads or crack the base. Apply thread locker to prevent loosening.
Can a BMX seat be too wide for street riding?
Yes. For street and park riding, a wide seat (over 10 inches) can get caught in pant legs or interfere with certain body movement and quick barspin tricks. A narrower mid-size seat (around 8-9 inches) offers better clearance without sacrificing too much comfort.
Should I choose a pivotal or traditional seat for durability?
Pivotal seats are generally more durable for heavy impact because they use a solid base without thin rails that can bend. However, they depend on a single bolt that can loosen. Traditional seats are durable if made with thick chromoly rails, but the rails are a vulnerable point. For hard street riding, a pivotal system is often preferred for its simple robustness.
What type of padding lasts the longest in a BMX seat?
High-density molded foam (like EVA or polyurethane) lasts the longest. It does not compress down permanently as quickly as softer polyurethane foams. It provides consistent support and retains its shape even after repeated impacts and weather exposure.