
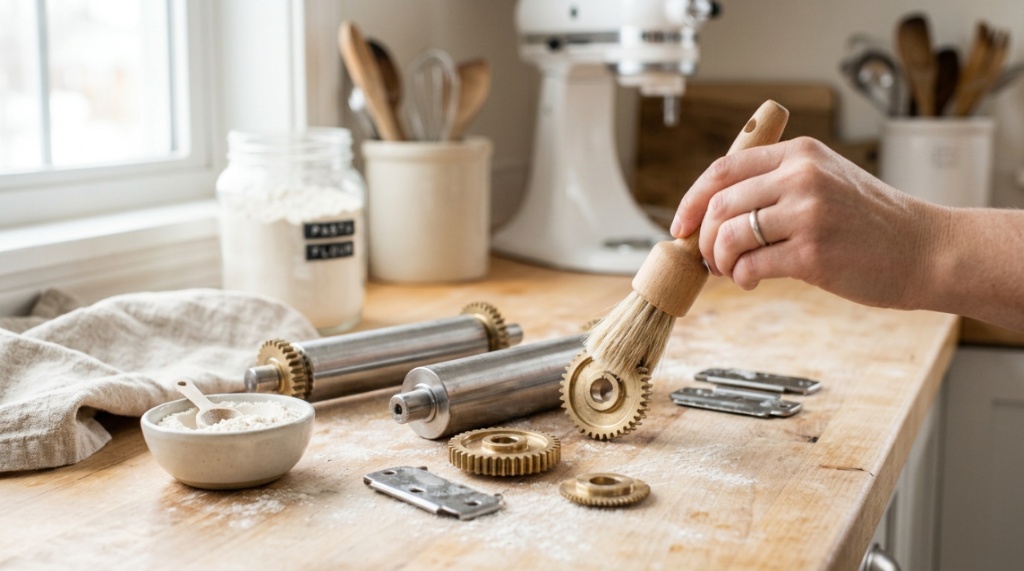
You’ve just finished rolling out silky fettuccine or perfectly grooved cavatelli, and then you see it—dried flour paste clinging stubbornly to every crevice of your KitchenAid attachment. The immediate urge is to run it under hot water, maybe scrub with soap. Stop right there. That instinct is precisely what ruins these precision tools. The problem is that standard cleaning methods—soaking, dishwashers, and harsh detergents—cause metal oxidation and rust. But you don’t need expensive specialty cleaners or hours of tedious work. In this guide, I’ll show you a foolproof, five-minute routine to clean KitchenAid pasta attachments effectively, preserving their performance for a decade or more.
What Is the Safest Way to Clean KitchenAid Pasta Attachments?
The absolute safest method is to use a dry, stiff nylon brush (or a dedicated wooden toothpick) to remove every trace of dried dough immediately after use. Water, soap, and dishwashers are your enemies here. This dry-cleaning approach prevents any moisture from seeping into the gears and bearing, which are the most vulnerable parts. Even if the dough has hardened, dry brushing is still the best first step.
Why You Should Never Submerge the Attachment in Water
Submerging the attachment in water is the fastest route to rust. The internal gears are made of carbon steel, which is not stainless. Tiny water droplets trapped inside the housing will oxidize the metal, causing the gears to grind and eventually seize.
Instead of washing, use these tools in this order: a stiff pastry brush (to remove bulk flour), a bamboo skewer (to dislodge stuck dough in narrow slots), and a dry microfiber cloth (for a final polish). This combination removes 95% of residue without introducing any liquid.
The “Two-Brush” Technique for Complete Coverage
Use a large, wide pastry brush for the exterior and rollers, and a small, narrow bottle brush (like those used for reusable straws) for the internal grooves and cutting holes. Begin by tapping the attachment upside down over the sink to knock out loose flour. Then, use the large brush to sweep along the rollers in a back-and-forth motion, following the direction of the ridges. Finally, use the small brush to push out any dough trapped in the cutting die.
Why Does Dough Stick to the Rollers and Cutters?
Dough sticks primarily due to moisture absorption and protein development. When you roll pasta, the gluten strands tighten and bond to the microscopic pores of the metal. If you leave the dough to air-dry on the attachment, it hardens into a cement-like substance that seems impossible to remove.
The Role of Flour Type and Hydration in Cleaning Effort
High-protein flours (like bread flour) create stronger gluten bonds, making them harder to clean. Wet, sticky dough (high hydration) will smear into the crevices, whereas a drier dough (like traditional semolina) tends to crumble away. Using a drier dough—around 55% hydration—not only yields better pasta texture but also dramatically simplifies cleanup, as the dough flakes off rather than smearing.
Understanding the Material: Aluminum vs. Steel Attachments
KitchenAid attachments are typically made of aluminum or stainless steel. Aluminum is lighter and conducts heat, but it reacts to acidic ingredients and is more prone to oxidation if scratched. Stainless steel is heavier and easier to maintain. Regardless of the material, both are machined with precision gears that require strict avoidance of water.
How Do You Clean Dried, Hardened Dough from the Attachments?
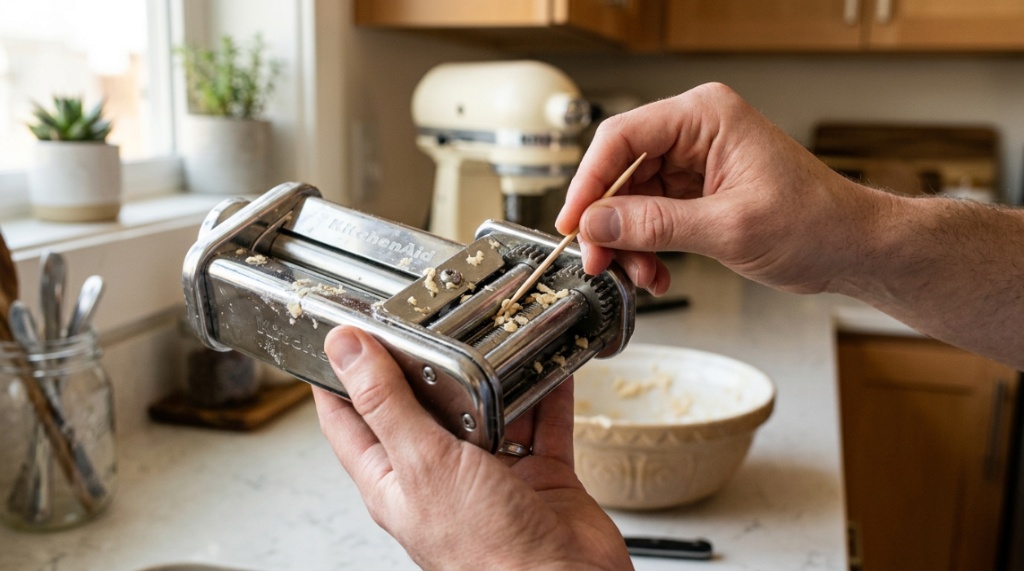
Even with quick action, you’ll occasionally forget, and the dough will turn into rock. Do not panic. Do not soak. Instead, break out the dry brush and a wooden toothpick. Scrape, brush, and tap your way through it. If the dough is extremely stubborn, place the entire attachment in a warm, dry oven (set to 170°F or warm setting) for 10 minutes.
Using a Wooden Toothpick for Precision Crevices
The toothpick is your best friend for cleaning the cutting die of the spaghetti or fettuccine attachments. Gently push the toothpick through each hole, working from the back toward the front. This will dislodge compacted dough strands without scratching the metal. If you use a metal skewer, you risk gouging the sharp edges of the cutter, which will permanently ruin its ability to slice cleanly.
The Oven-Warm Trick for Stubborn Residue
Warming the attachment slightly (never above 180°F) makes the dried dough brittle. The residual flour and dough will begin to crack and flake off easily. Let the attachment cool completely before brushing. This method is particularly effective if you’ve accidentally left the attachment out for several days with dough residue on it.
Step-by-Step Deep Dry Clean Process
- Tap the attachment upside down on a wooden cutting board to loosen debris.
- Use the stiff nylon brush to scrub all visible rollers and surfaces.
- Use a bamboo skewer to poke out dough from every cutting slot.
- Brush again with a soft brush to remove loosened particles.
- Wipe down with a dry cotton cloth to remove microscopic flour dust.
Can You Use Soap or Vinegar on KitchenAid Pasta Attachments?
No, you should never use soap, dish detergent, or vinegar on these attachments. Soap leaves a residue that alters the taste of your next batch of pasta, and vinegar’s acidity accelerates the oxidation process on the metal. The only exception is if you’ve somehow gotten grease or oil on the attachment—which should be solved by wiping with a dry paper towel only.
The Danger of Soap Residue and Future Pasta Quality
Soap film is almost invisible, but it’s very real. When you roll fresh pasta over surfaces with soap residue, you’ll notice your dough slides differently, and you might detect a faint chemical taste. This ruins the flavor of what should be a simple, flour-and-egg delight. If you must degrease, wipe with a dry cloth known to absorb oils, like a coffee filter or a clean paper towel.
What to Do If You Accidentally Wet the Attachment
If water accidentally touches the attachment, immediately wipe it dry with a soft cloth, then use a hairdryer on the cool setting to force any remaining moisture out of the gears. Place the attachment in a warm, dry spot for 24 hours before storing. Do not use heat from a hairdryer on the hot setting, as this can warp the aluminum components.
How Often Should You Clean Your Pasta Attachments?
You should perform a dry-brush cleaning after every single use—without exception. This takes less than two minutes if you do it while the dough is still soft. Beyond that, perform a deep “dismantling” clean once a month if you use the attachments weekly, checking for any flour build-up in the gears.
Determining Your Usage-Based Cleaning Schedule
If you use your attachment once a week, a quick dry brush after each use suffices. For heavy users (twice a week or more), monthly maintenance is needed to remove accumulated flour dust that can gum up the gears. For occasional users, clean thoroughly after each session, then lightly oil the moving parts with food-grade mineral oil to restore smoothness.
Signs That Your Attachment Needs Immediate Attention
- A squeaking or grinding sound when turning the crank.
- Visible flour dust escaping from the gear housing.
- Resistance when rolling dough (more than usual).
- Rust spots appearing on the exterior or rollers.
Seeing any of these signs means you have moisture or debris inside. Follow the wet-cleaning recovery steps immediately to prevent permanent damage,Once your attachments are completely dry, store them safely in a dry cabinet. If you love making homemade pasta and need a smart way to dry your batches before cooking, check out our guide on how to choose a space-saving bamboo pasta rack in NC to keep your kitchen organized.
Which KitchenAid Pasta Attachments Are Easiest to Maintain?
Stainless steel attachments are the easiest to maintain because they resist rust better and are smoother, allowing dough to release easily. The classic 3-piece set (lasagna, fettuccine, spaghetti) features simpler rollers that are easier to clean than the more complex shapes like cavatelli or ravioli, which have deeper ridges. If you’re on a budget, the aluminum models work just as well but require slightly more meticulous drying.
Comparing the Cleaning Effort: Roller vs. Cutter Attachments
| Attachment Type | Cleaning Effort | Key Concern | Best Cleaning Tool |
|---|---|---|---|
| Lasagna (Flat) | Low | Minimal crevices | Large pastry brush |
| Spaghetti (Cut) | Moderate | Holes clog quickly | Bamboo skewer |
| Fettuccine (Cut) | Moderate | Narrow slots | Narrow bottle brush |
| Cavatelli (Shaped) | High | Deep ridges and dies | Toothpick + small brush |
| Ravioli (Pressed) | High | Food residue from filling | Dry wiping + toothpick |
Budget-Friendly Attachments That Are Still Easy to Clean
If you’re looking for an affordable entry point that won’t make cleaning a nightmare, opt for the stainless steel “set of three” from standard manufacturers. They avoid complex shapes. For a deep dive into the best budget options that balance price and easy upkeep, check out this guide on clean KitchenAid pasta attachments—you’ll find picks specifically evaluated for low-maintenance cleaning.
When Should You Replace a KitchenAid Pasta Attachment?
You should replace the attachment when you notice pitting on the rollers, severe rust that won’t come off with dry brushing, or when the gears grind inconsistently. Generally, with proper dry cleaning, attachments last for many years. But if you’ve accidentally submerged them multiple times, replacement is the safer and more efficient option.
Runout and Warping: How They Affect Cleaning and Performance
Runout refers to the roller not being perfectly straight, which causes uneven pasta thickness. Warped rollers also collect dough more readily because the surface pressure is uneven. If you see wavy pasta sheets, the roller may be warped—this is often from harsh cleaning methods with hot water. Replace warped attachments immediately; they’re impossible to fix and only frustrate cleaning efforts.
How to Store Pasta Attachments to Minimize Cleaning
Proper storage is an extension of cleaning. Storing your attachments in a dry, sealed plastic bag or the original box with a silica gel packet prevents moisture and dust from accumulating. This reduces the need for deep cleanings and keeps the rollers polished.
The Best Way to Store Attachments Between Uses
After cleaning, wrap the attachment in a dry paper towel (not cloth, which can retain moisture) and place it in a zip-lock bag with the air squeezed out. Store it in a cabinet away from the stove or dishwasher to avoid steam and heat fluctuations.
Climate Considerations: Humidity and Seasonal Storage
If you live in a humid environment, add an extra silica packet inside the bag. Consider using a food-grade mineral oil coating on the metal parts before long-term storage (over three months without use). Apply a tiny bead of oil to a cloth and wipe the rollers—it creates a barrier against moisture. Before using again, simply wipe off the oil with a dry cloth.
Frequently Asked Questions
Can I put KitchenAid pasta attachments in the dishwasher?
Absolutely not. The dishwasher is the worst possible environment for these attachments. The combination of hot water, heat cycles, and harsh detergents will instantly rust the carbon-steel gears and strip any protective coating. Always hand-clean with a dry brush.
Is it safe to use a toothpick on the pasta cutter?
Yes, wooden toothpicks or bamboo skewers are safe. They are softer than the metal and can be inserted into the cutting holes without scratching the precision edges. Avoid metal tools, which will dull the blades.
What should I do if rust appears on the attachment?
If rust appears, remove it gently with a fine-grit abrasive pad (like 400-grit sandpaper) being careful to only touch the rusted area. Wipe clean and immediately coat with a tiny bit of mineral oil. If rust is extensive, replace the attachment.
How do I get rid of the organic flour smell from the rollers?
Since you can’t use soap, sprinkle a small amount of dry cornstarch or baking soda on the rollers and brush it off. This neutralizes odors and picks up hidden fat from the eggs in your pasta dough.
Can I use the attachments to make gluten-free pasta, and does it affect cleaning?
Yes, you can, but gluten-free flours (like rice or chickpea) are stickier and finer. They can get into more crevices. Clean immediately with a dry brush and then use an air blower (like a camera lens blower) to remove fine dust from the gears.
Is there a final step to ensure the attachment is fully dry?
Yes, after brushing, take a dry microfiber cloth and hold it against all metal surfaces for 30 seconds each. This absorbs residual humidity. Then leave the attachment out on the counter for 15 minutes before storing to allow any trapped moisture to evaporate.
Don’t Let Cleaning Stop You from Making Fresh Pasta
The secret to enjoying your KitchenAid pasta attachments is realizing that cleaning is a dry process, not a wet one. By adopting the dry-brush and toothpick method, you’ll eliminate 99% of common issues like rust, poor cutting, and stuck dough. Consistency is key—make it a habit to brush immediately after rolling, and your attachments will stay as good as new for years. So, go ahead, roll out that fresh tagliatelle tonight. Enjoy the process without fearing the cleanup, because now, you are armed with the exact, safe, and easy technique to keep your tools pristine.
If you’re still using a sub-par attachment or looking to expand your collection with a budget-friendly option that’s easier to maintain, review the top-rated attachments in your area to elevate your fresh pasta game effortlessly.